

Transformations
Transformations in Boost allows you to generate one document instance from another or to update a document according to a fixed set of transformation rules.
Some simple examples of this is:
- Generating an Invoice from a Subscription
- Creating a Client from a Proposal
- Creating an Employee from a Job Application
- Creating an Asset from a Purchase Order
Transformations are very powerful and flexible, but with this flexibility comes the necessary complexity. In order to help with understanding the possibilities, this section will describe different examples of scenarios where transformations are used in different ways. The examples are simplified to focus on illustrating the core concepts and may therefore seems slightly contrived from a business perspective.
General Concepts
A transformation always consists of a source and a destination document type. The source is the document type used as input to the transformation and the destination is the type of document that will be created or updated. A transformation can have the same document type as source and destination.
Next, a transformation has a generation strategy
Transformations can be used for different purposes. For starters, it is the most robust and efficient way to import your existing (Excel) data into Boost.
With a transformation you can copy information from one field in to another field/document and even add conditions for information to be copied.
You can also do calculations with a transformation.
It is possible to upload mutiple files to merge them into one result.
All of this and much more can be done by transformations.
Examples
- Copying a field from a source Form to a field in another Form
- Sending an email or Teams message when a Form is filled in or status is changed
Copying a field from a source form to a field in another form
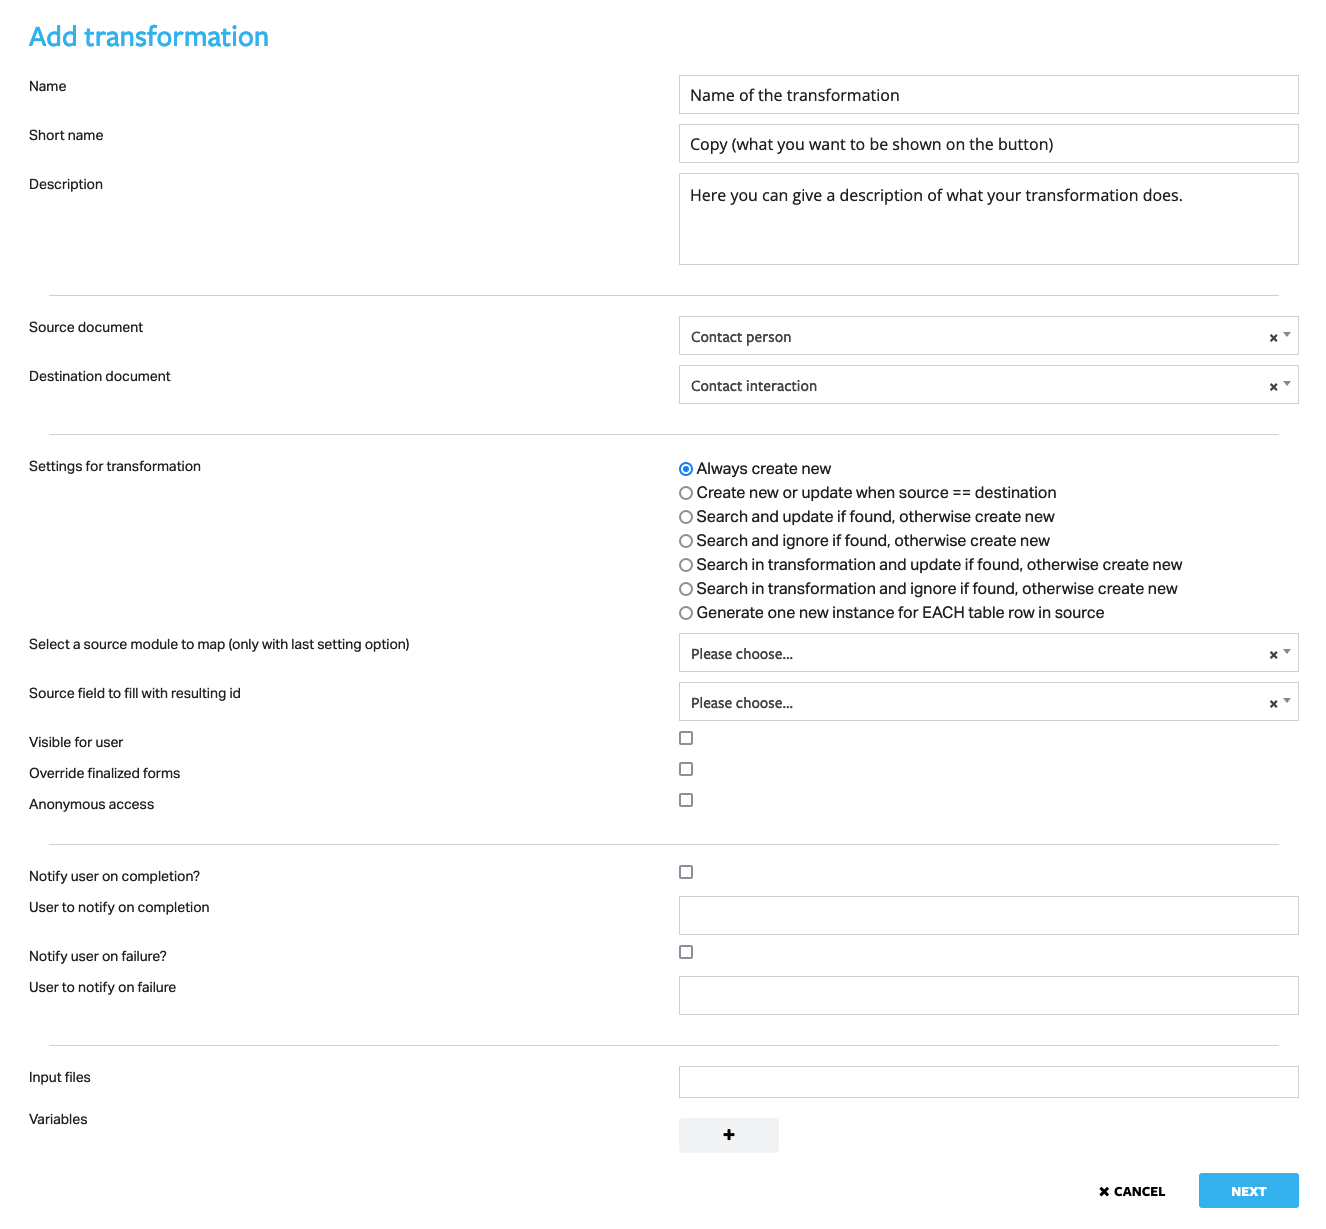
In this example we will copy the surname of client from the form Contact person to the form Contact interaction
- Give your transformation a name
- Give a short descriptive name you want printed on the button eg. Copy
- Select the Source (Contact person) and Destination (Contact interaction) document
- Select the settings for the transformation - Always create new
- Choose whether the button will be visible to users
- Override finalized forms
- Anonymous access
- Notify user on completion
- User to notify on completion
- Notify user on failure
- User to notify on failure
- Input files
- Variables
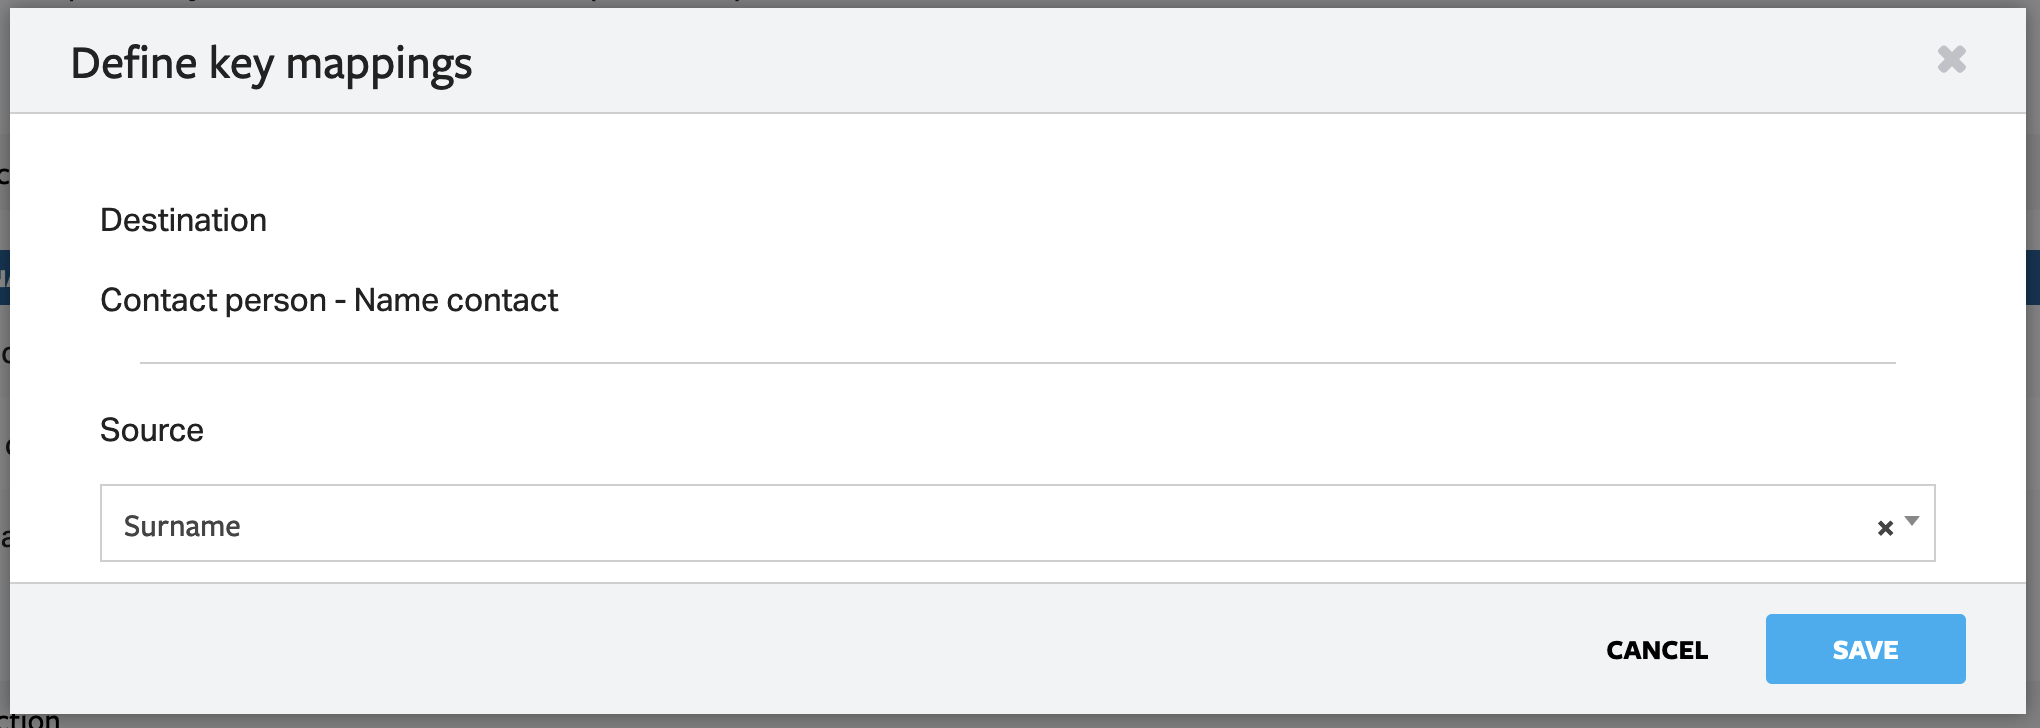
In the next screen you can select the fields that have to be copied "as is" to the destination form
- Click on the + next to the field in your destination document you want to copy the information to
- Click on Source and choose the field you want to copy and click on save. In the variables column you will see the field you are goint to copy

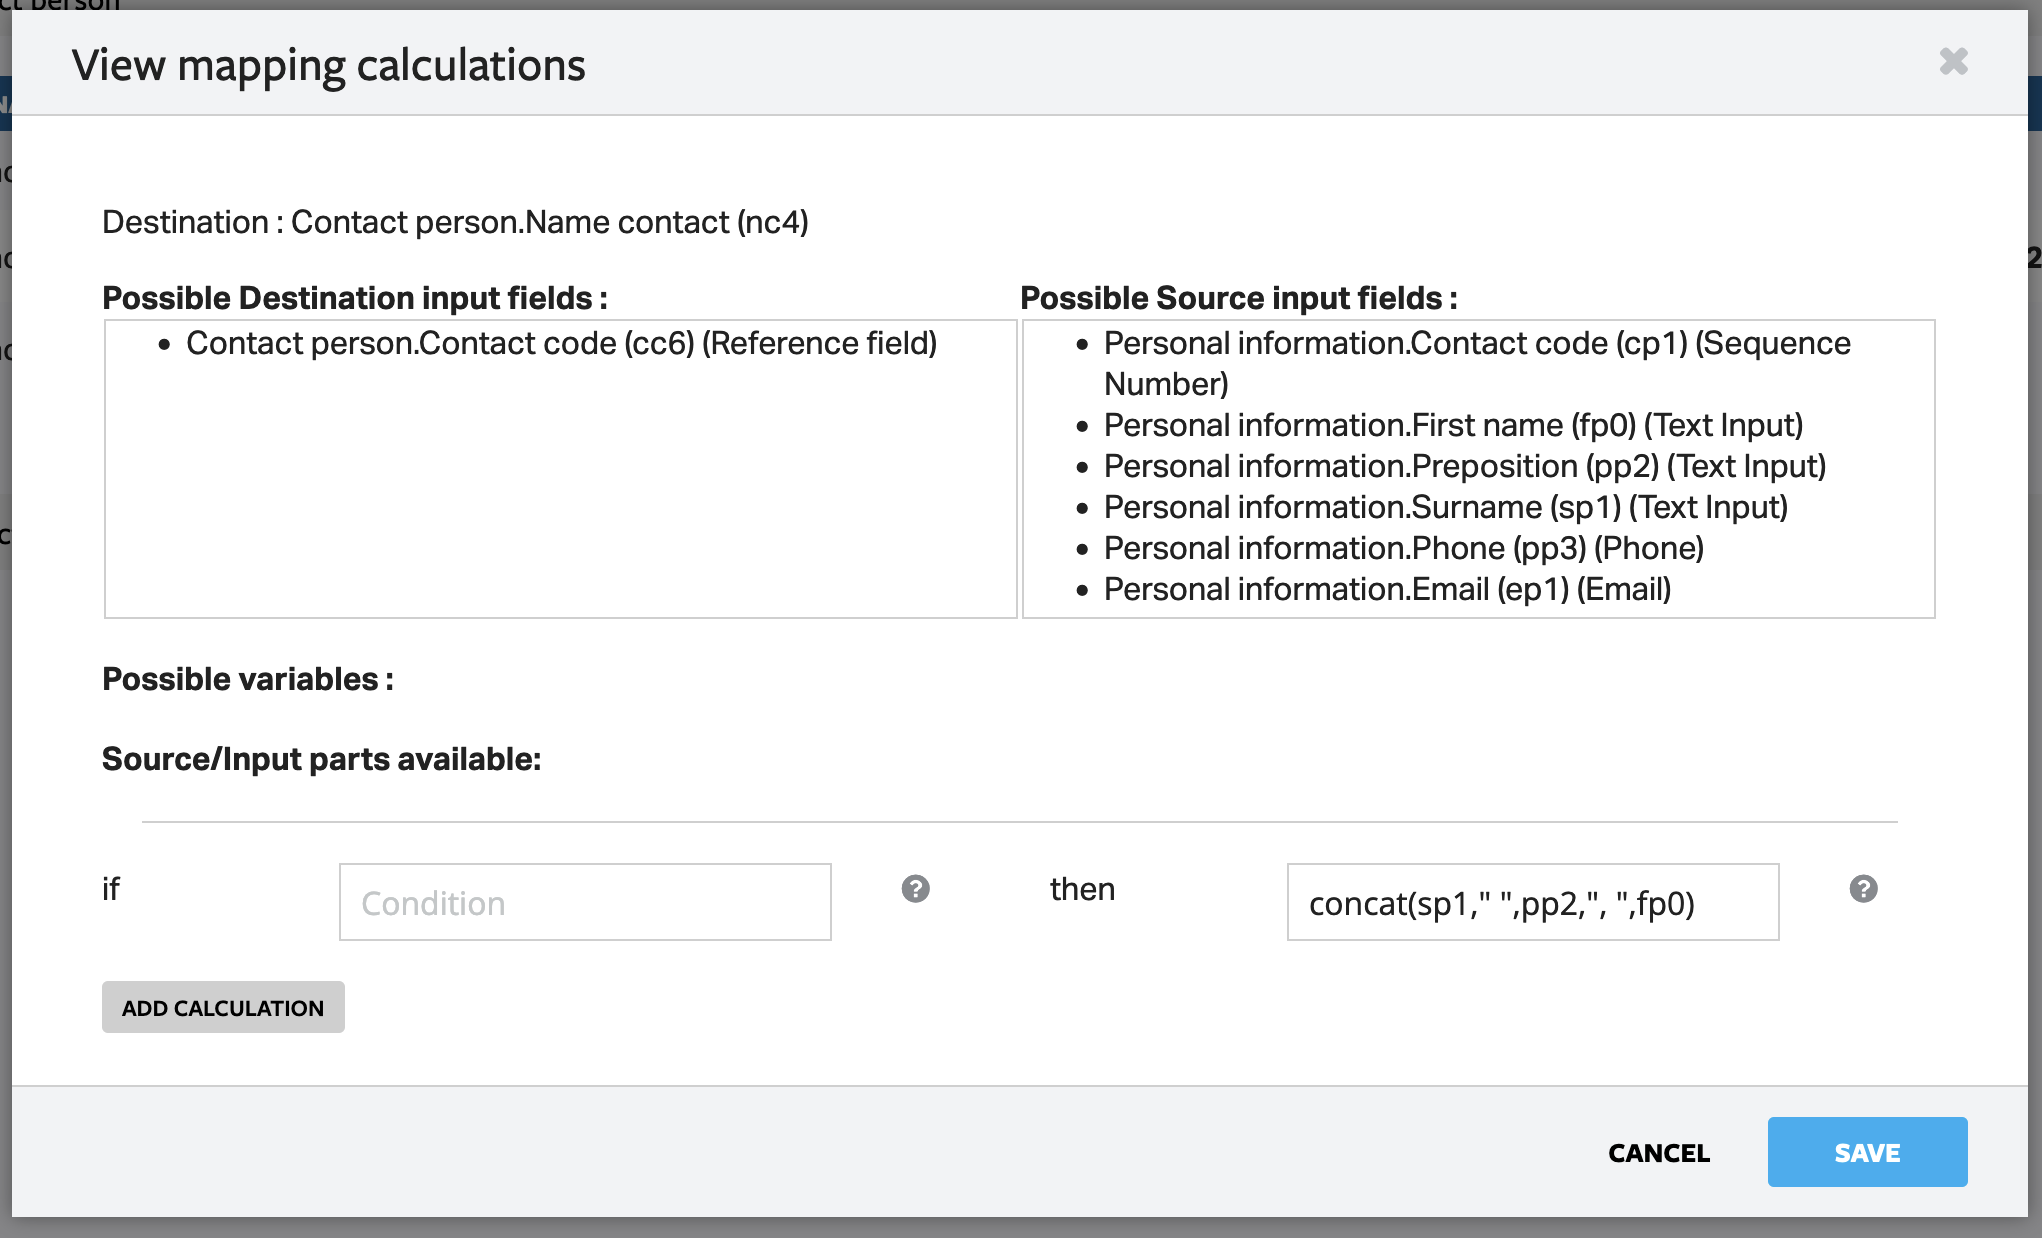
If you need to copy information from two fields in your source document to one field in your destination document you can click past this first variable screen to the next screen. Here you can add calculations to combine fields, for instance you can copy First name and Surname to a field Contact person
- Click on the + next to the field in your destination document you want to copy the information to
- In the Source/Input parts available add the fields you want to copy into the Algorithm block and click on save
Sending an email or Teams message when a Form is filled in or status is changed
In this example we will send an Teams message to the plannig team when an employee fills in a holiday request.
The HR employee gets the message and can approve or decline the request immediately.
The requesting employee gets an email stating whether the holiday was approved / denied.
- Create three templates:
- for a new holiday request
- for an approved request
- for a denied request
- Create a transformation to send a message when a new request is made
- Create a transformation to send an "Approved" mail
- Name eg. Holiday approve
- Short name eg. Approve (this is the name that will be shown on the button)
- In this case your Source and Destination document will be the same as it will trigger a status change
- Settings: Create new or update when source == destination
- Check Visible for users
- Check Anonymous access
- Next
- In the Assignee section click on Add calculation and choose If - Then: NOW
- In the Admin (or whatever the name is of the module the Status field is in in your own form) section click on Add calculation behind Admin.Status and fill in If - then: concat("Approved") - Make sure that this is a valid status you use and is correctly spelled.
- Create a transformation to send a "Declined" mail
- Name eg. Holiday decline
- Short name eg. Decline (this is the name that will be shown on the button)
- In this case your Source and Destination document will be the same as it will trigger a status change
- Settings: Create new or update when source == destination
- Check Visible for users
- Check Anonymous access
- Next
- In the Assignee section click on Add calculation and choose If - Then: NOW
- In the Admin (or whatever the name is of the module the Status field is in in your own form) section click on Add calculation behind Admin.Status and fill in If - then: concat("Declined") - Make sure that this is a valid status you use and is correctly spelled.